Around The World, Part 34: A pretty sky
This post is part of a series about Around The World, a game of exploration and discovery at sea. The game is currently in early development. If you're new to this project, you can read up on it here.
In the last post, I got the game’s clouds to look passable. But after looking at it during playtesting, I still wasn’t satisfied with the way the overall picture of how sea, sky and clouds came together. With some small tweaks, things started to look a lot better.
Light scattering in clouds
I ended the previous post using a lookup table rendered out by povray, that contains the amount of light scattered out of clouds depending on light angle (horizontal axis) and cloud density (vertical axis):
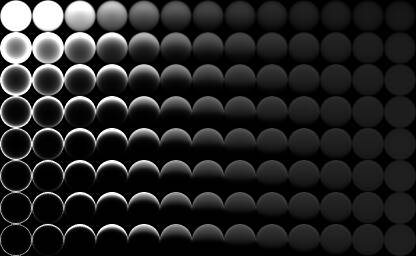
And I wrote about my dissatisfaction with this table:
I am beginning to suspect that povray doesn’t actually simulate multiple scattering at all; the documentation does not say yes or no either way. No matter how many samples and intervals I configure, I can’t get the bottom of those spheres to become lighter.
Once again I’m tempted to write my own recursive ray tracer to confirm my suspicions, but I resisted the urge […]
In the end, curiosity got the better of me and I did write my own multithreaded recursive Monte Carlo ray tracer in a few hundred lines of Rust. It’s extremely dumb and hard-coded for this specific situation, so it only renders one perfectly spherical cloud of uniform density. But it was enough to confirm that indeed, povray does not simulate multiple scattering. With multiple scattering, the lookup table looks very different:
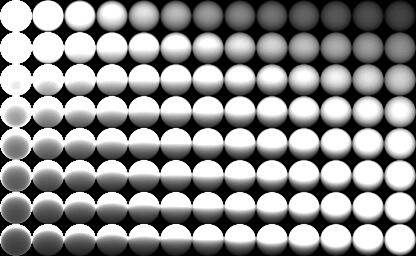
The comparison is not entirely apples to apples, because I also tweaked some parameters and the scaling of the axes. But overall, the effect is clear: the light coming out of the cloud is distributed much more uniformly, making the cloud appear lighter overall.
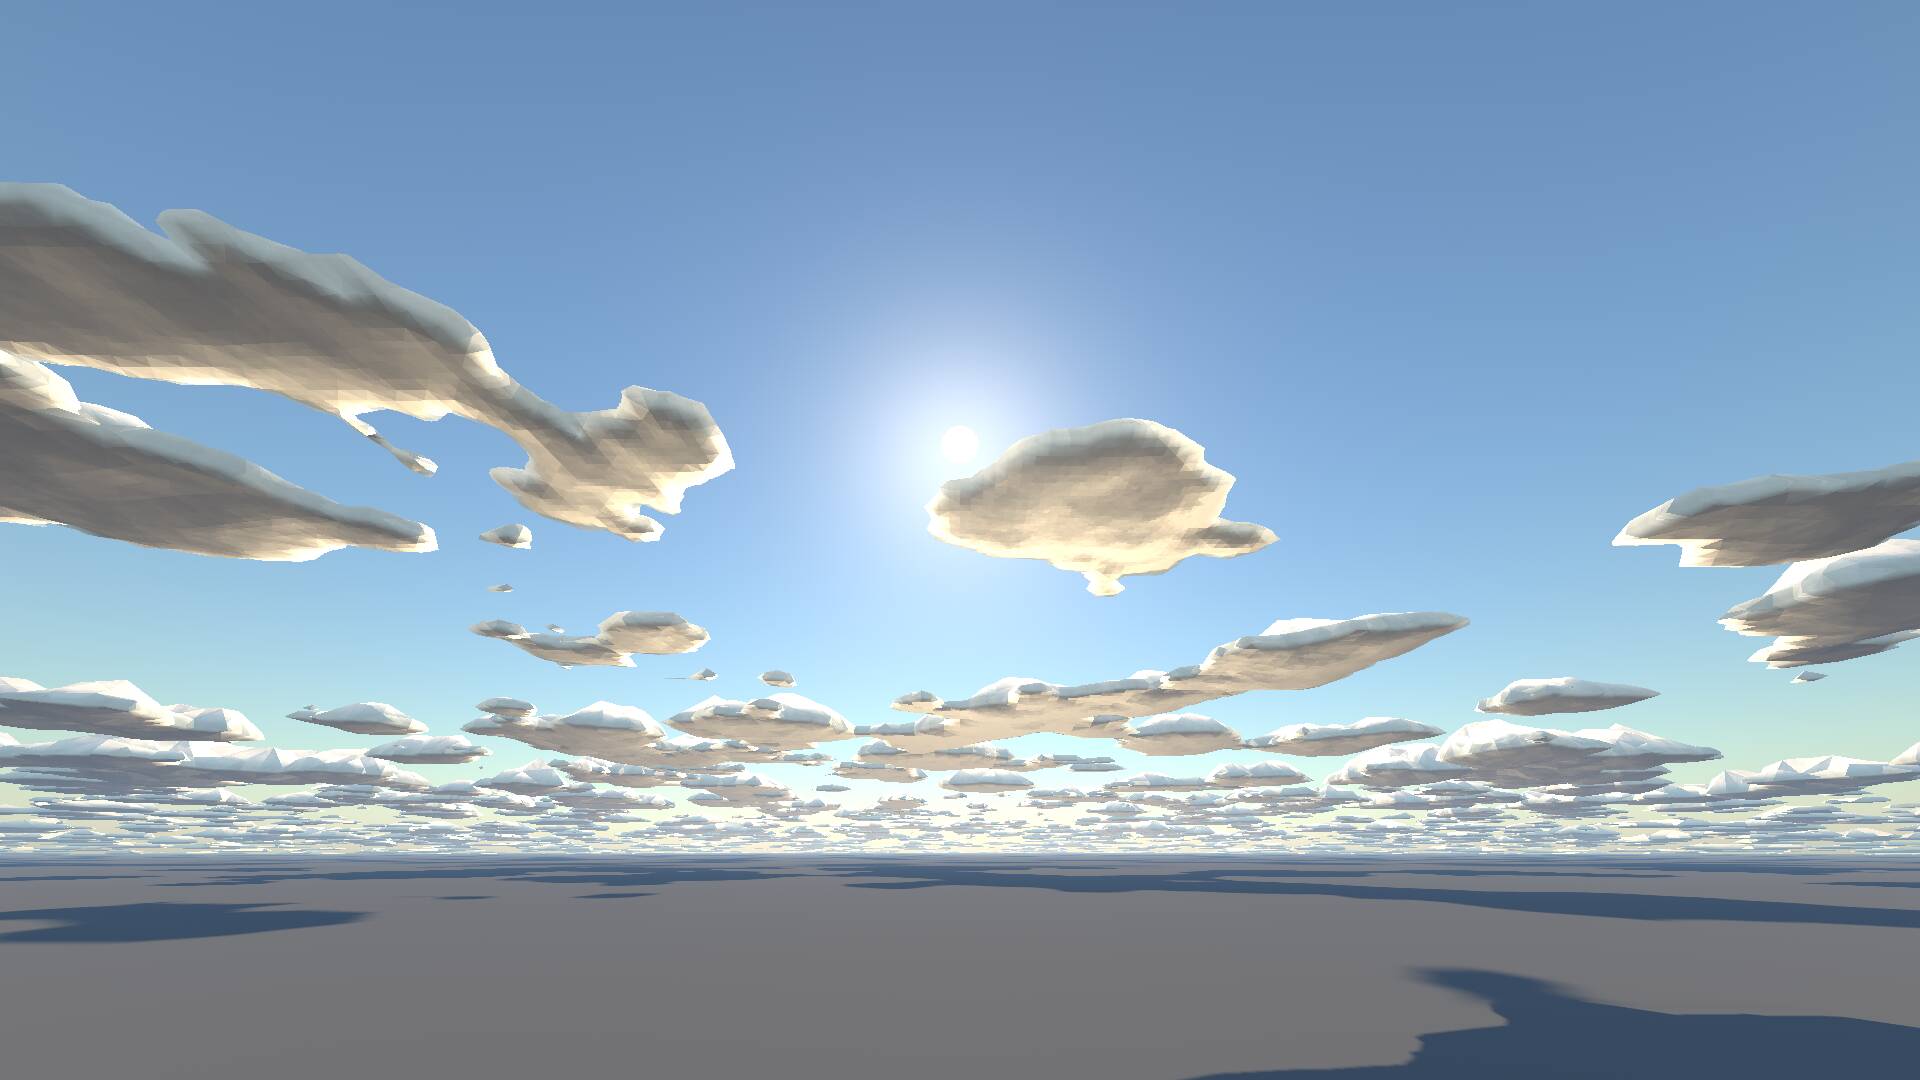
At low density (thin clouds), the difference is not very apparent; the top rows of the lookup tables are very similar. After all, there isn’t much opportunity for a light ray to be scattered more than once when density is low. So let’s compare the look at a higher density, representing a thicker cloud layer. Here are some clouds rendered with the old LUT:
And here with the new:
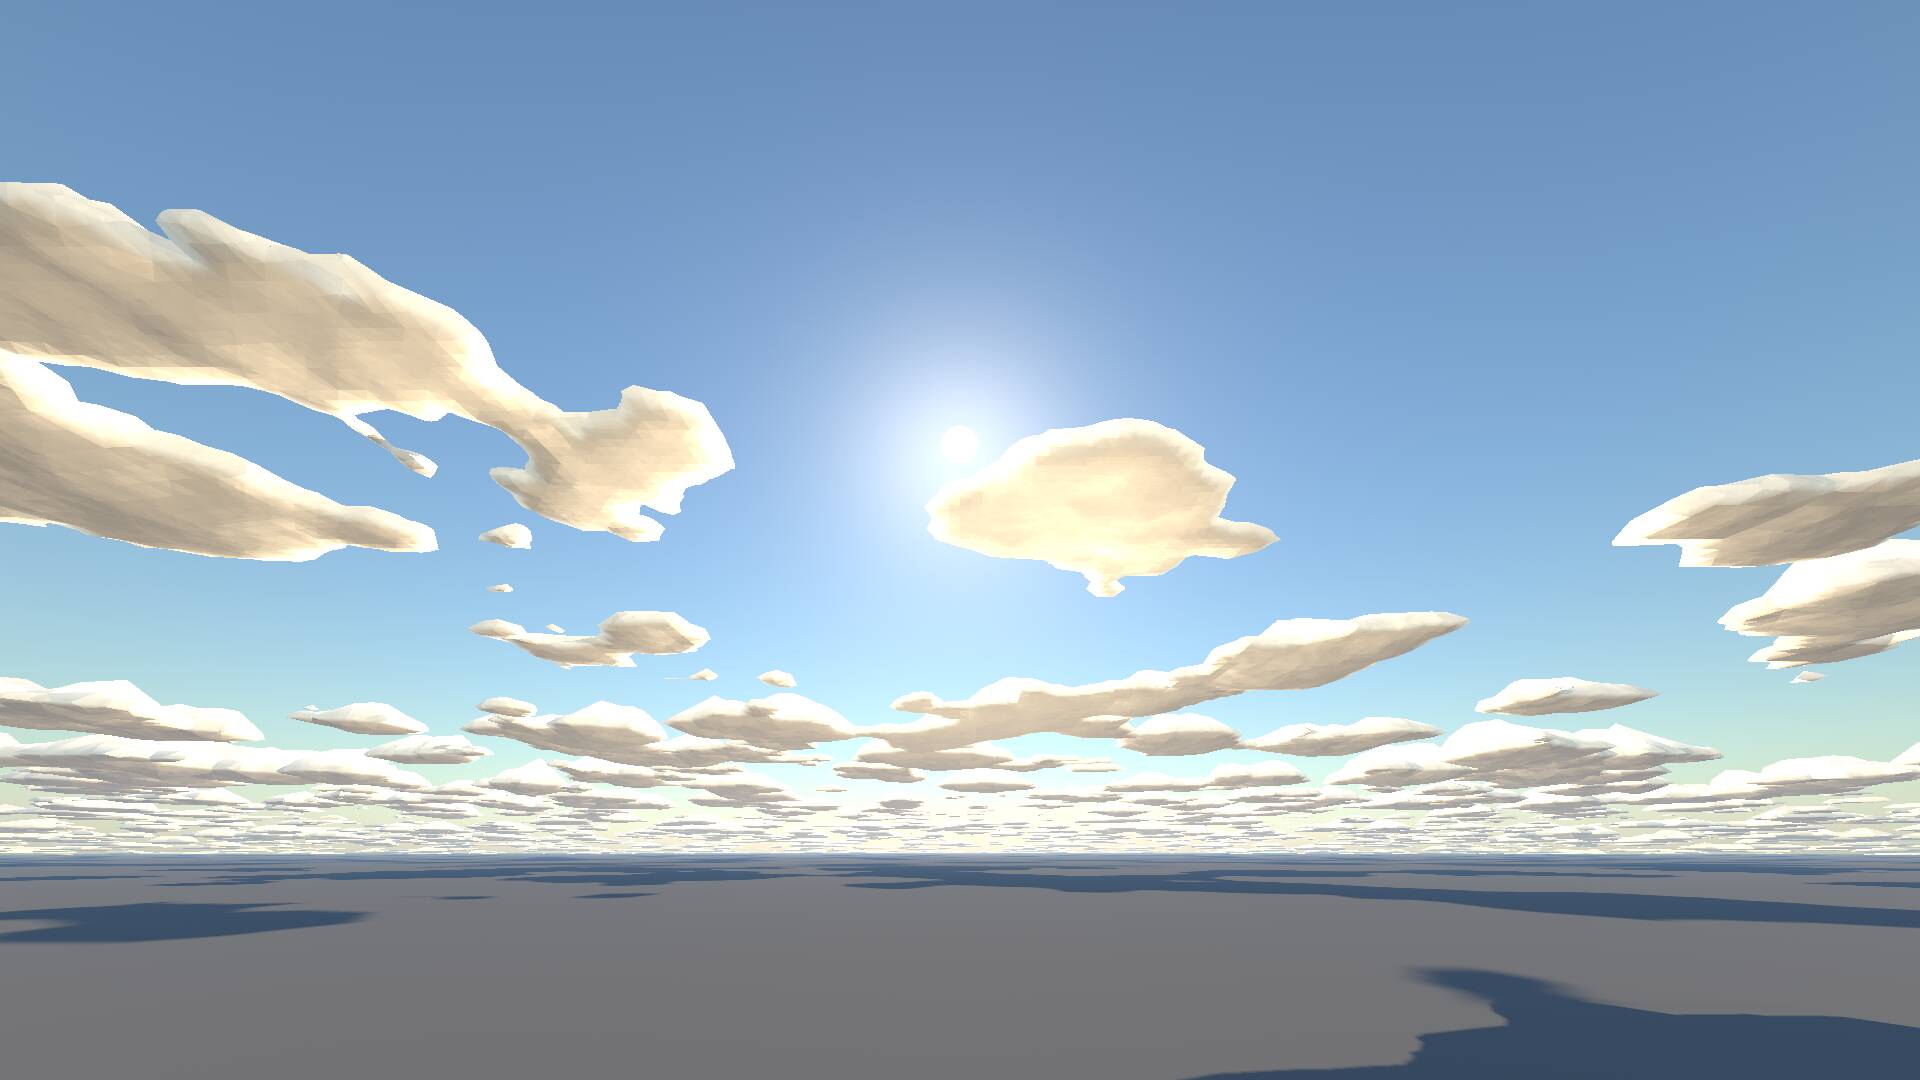
The “metallic” look that I mentioned in the last post is now gone; cloud bottoms are brighter, and lighting is smoother overall.
One weird trick
In reality, clouds aren’t just lit by the sun directly. They also receive, and scatter, indirect sunlight from the sky. Since this light is usually tinted blue, the clouds should take on a more blueish hue as well.
I don’t want to add a constant “blue” term, since that is only correct during daytime; we’d want clouds to follow the current colour of the sky even at sunrise, sunset or night. How could I do that in Godot?
The answer turns out to be simple, but requires some understanding of how Godot’s light rendering works. Besides direct light, which we already handle, Godot also takes into account indirect light from the environment. This all happens under the hood outside user control, so my understanding is vague, but good enough to be useful.
As far as I understand it, indirect light is sampled from a cube map or two, containing radiance and irradiance from every direction. (I know radiance and irradiance are different things, but I don’t fully understand the distinction.) For diffuse materials like clouds, I’d expect the this cube map (these cube maps?) to be sampled in the direction of the surface normal, since that represents where most indirect light is coming from.
At the bottom of clouds, this normal points downwards towards the ground, so the cloud is rendered with little indirect light here. In reality, it does receive indirect light, but from above: it’s just scattered through the cloud. So, what would happen if we tweak the normal to point upwards to the sky instead? The effect is subtle but important; here’s before:
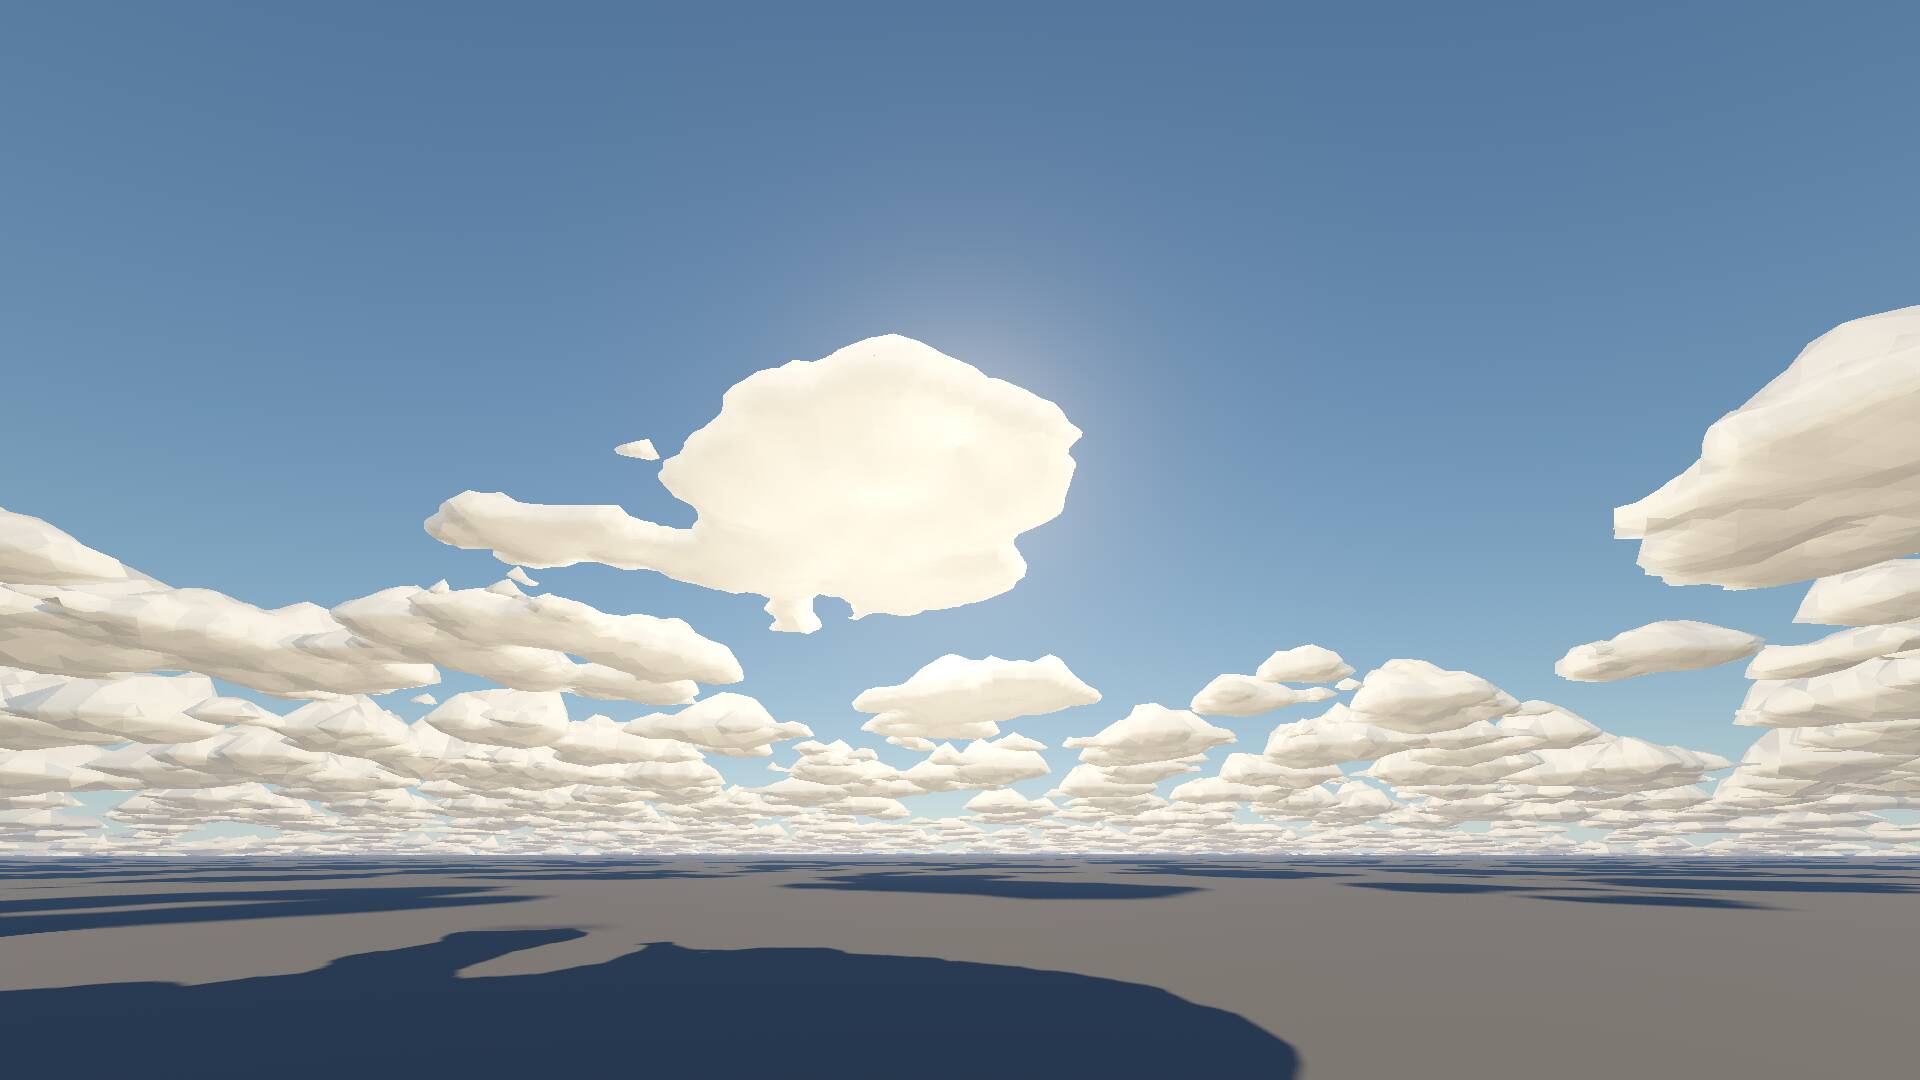
And here’s after:
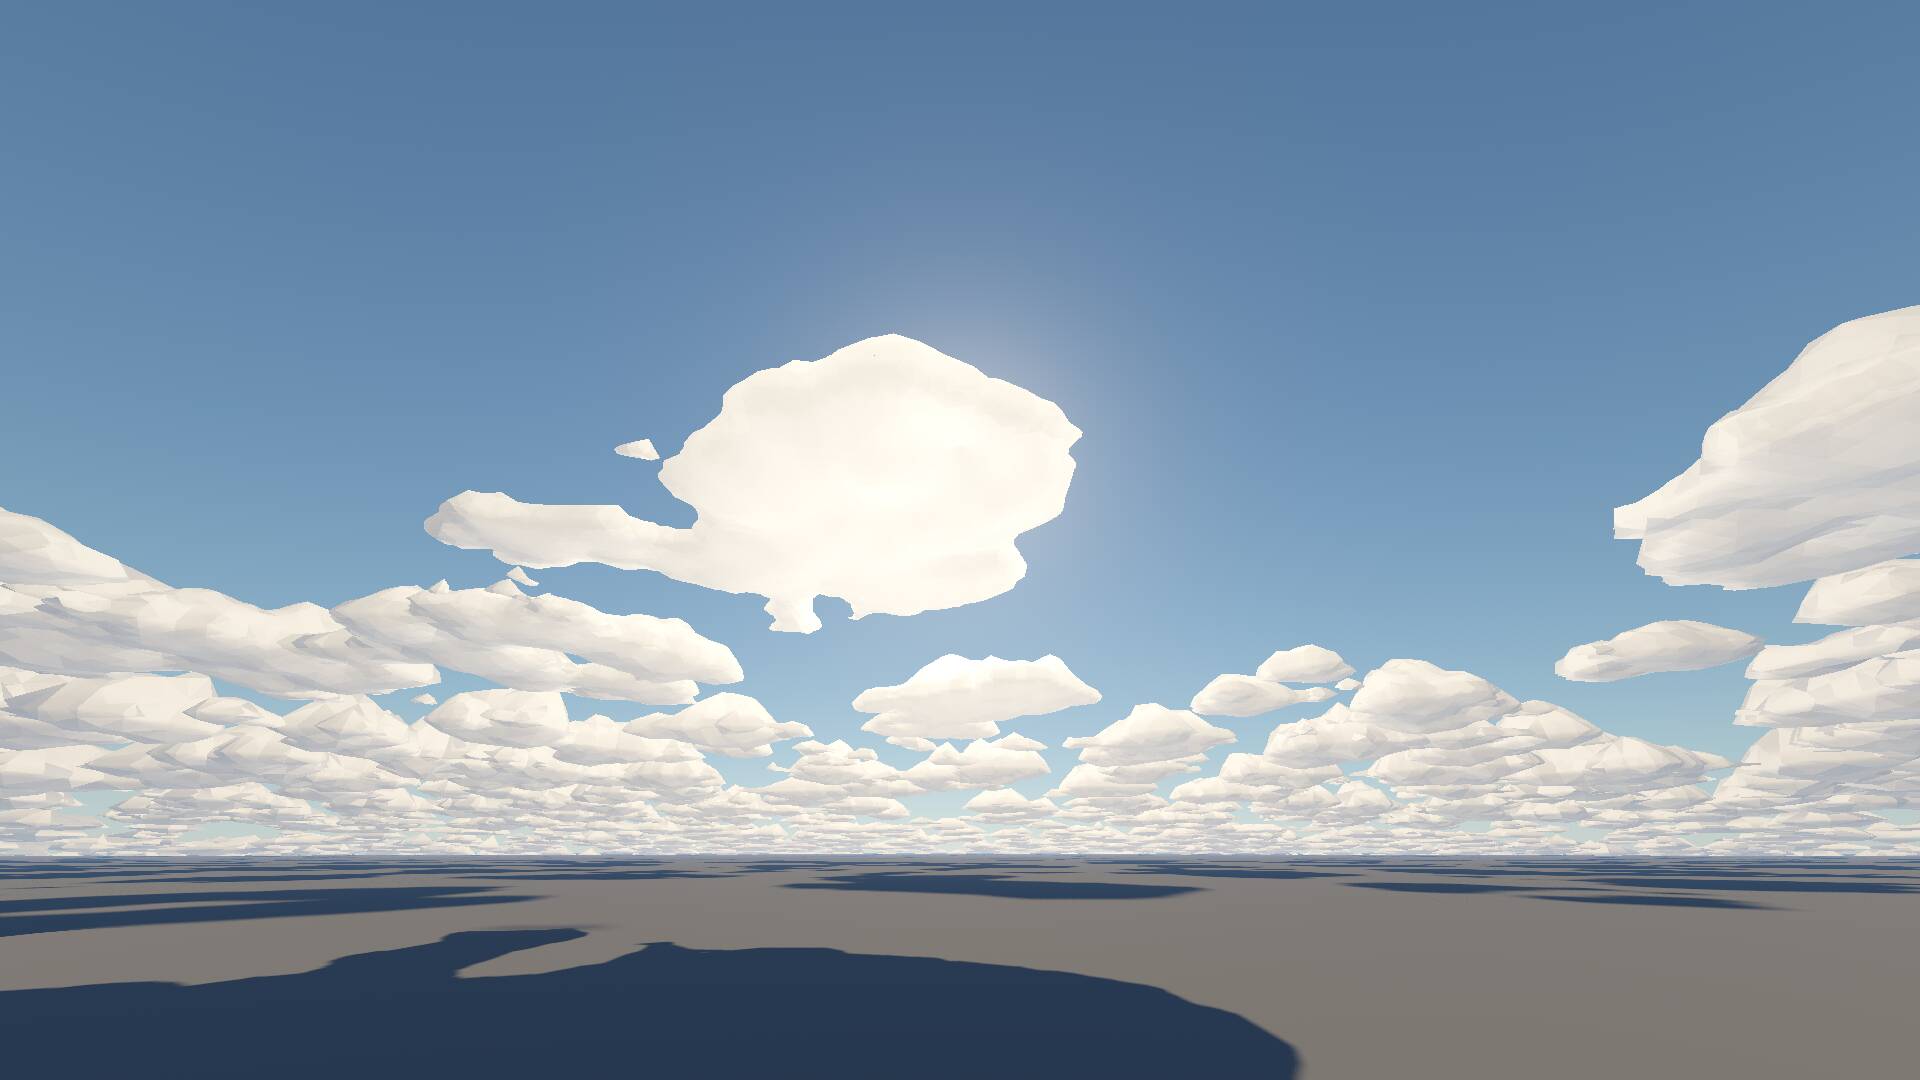
The clouds have indeed gotten a blueish hue, making them blend in with the sky much better, and generally giving them a softer and more distant look, as clouds should have. I like this a lot!
How about a sunset, when the sky is not almost uniformly blue? Here’s before:
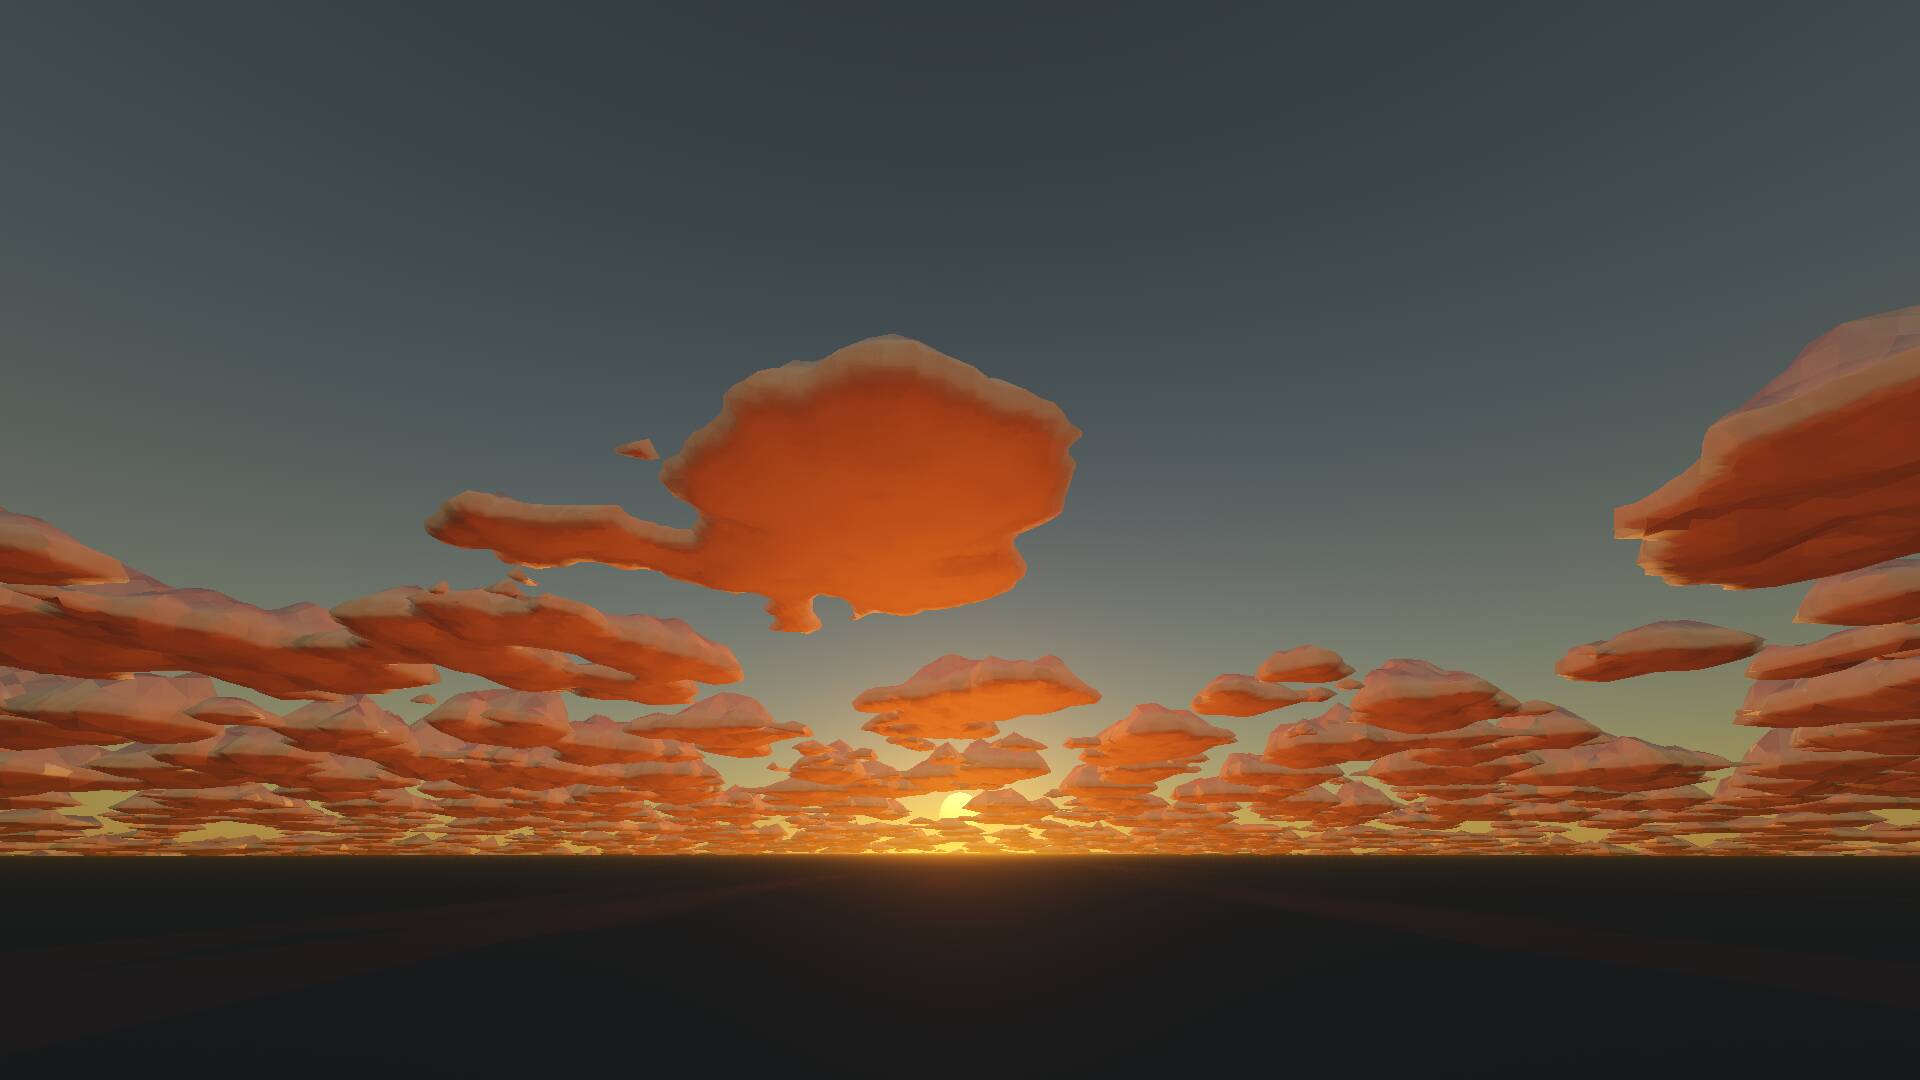
The bottoms of the clouds are tinted orange, because the incoming direct sunlight is orange due to heavy Rayleigh outscattering. Here’s the same sunset with tweaked normals:
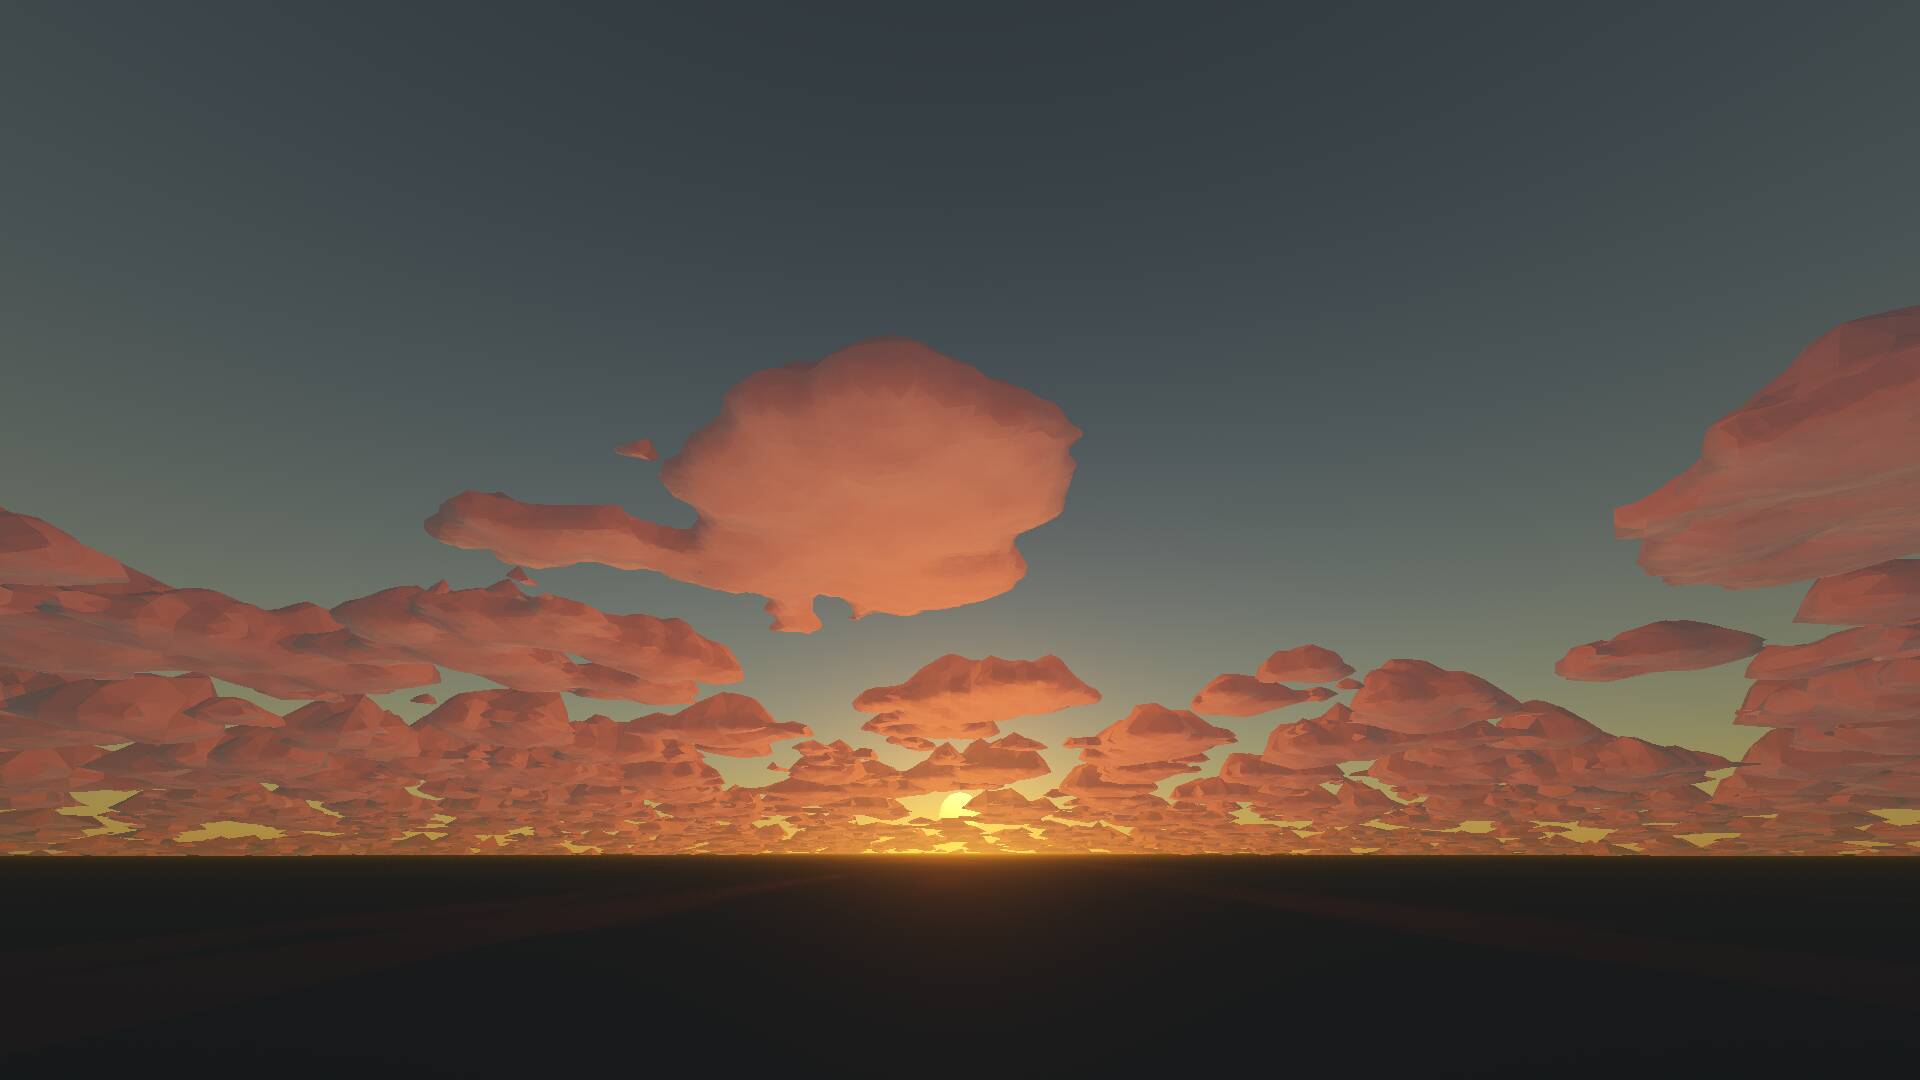
The clouds have turned pink! I think this is much closer to how real sunsets look; the pink hue is apparently the result of mixing red (direct sunlight) and blue (indirect sky light), with the green channel getting somewhat lost in between.
Atmospheric scattering
Another thing that bothered me was that the sky looked unnaturally yellow near the horizon. This is fine and expected when the sun is low, but it was happening even with the sun straight overhead, like here:
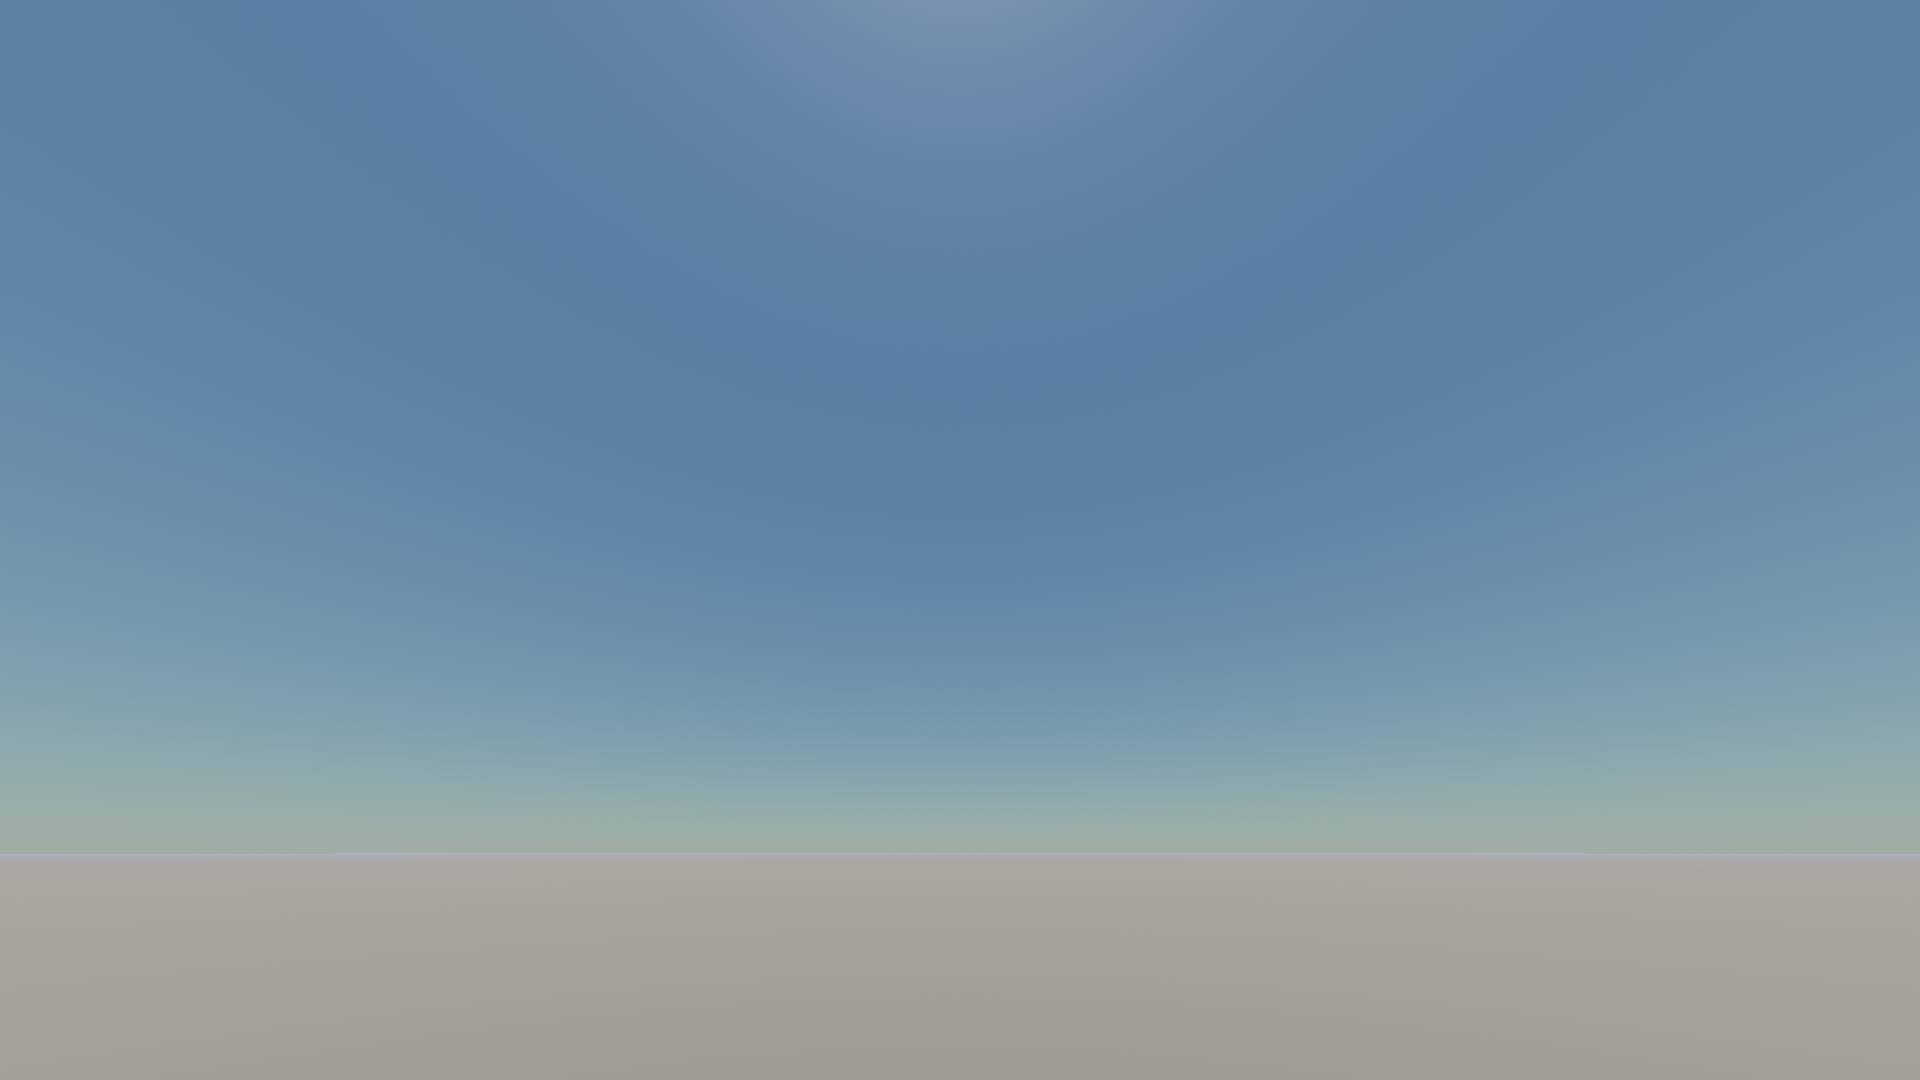
I suspected that this was due to applying too much outscattering during the raymarch compared to inscattering, so I tried various hacks like adding a fake multiple inscattering term. In the end, a better fix turned out to be changing the order in which operations happen during the ray march. Instead of:
- Add (blueish) light scattered into the ray segment
- Attenuate by outscattering over the ray segment (reddening)
… I reversed the order:
- Attenuate by outscattering over the ray segment (reddening)
- Add (blueish) light scattered into the ray segment
The effect is that less attenuation happens along the way, compared to inscattering, and the result looks much better:
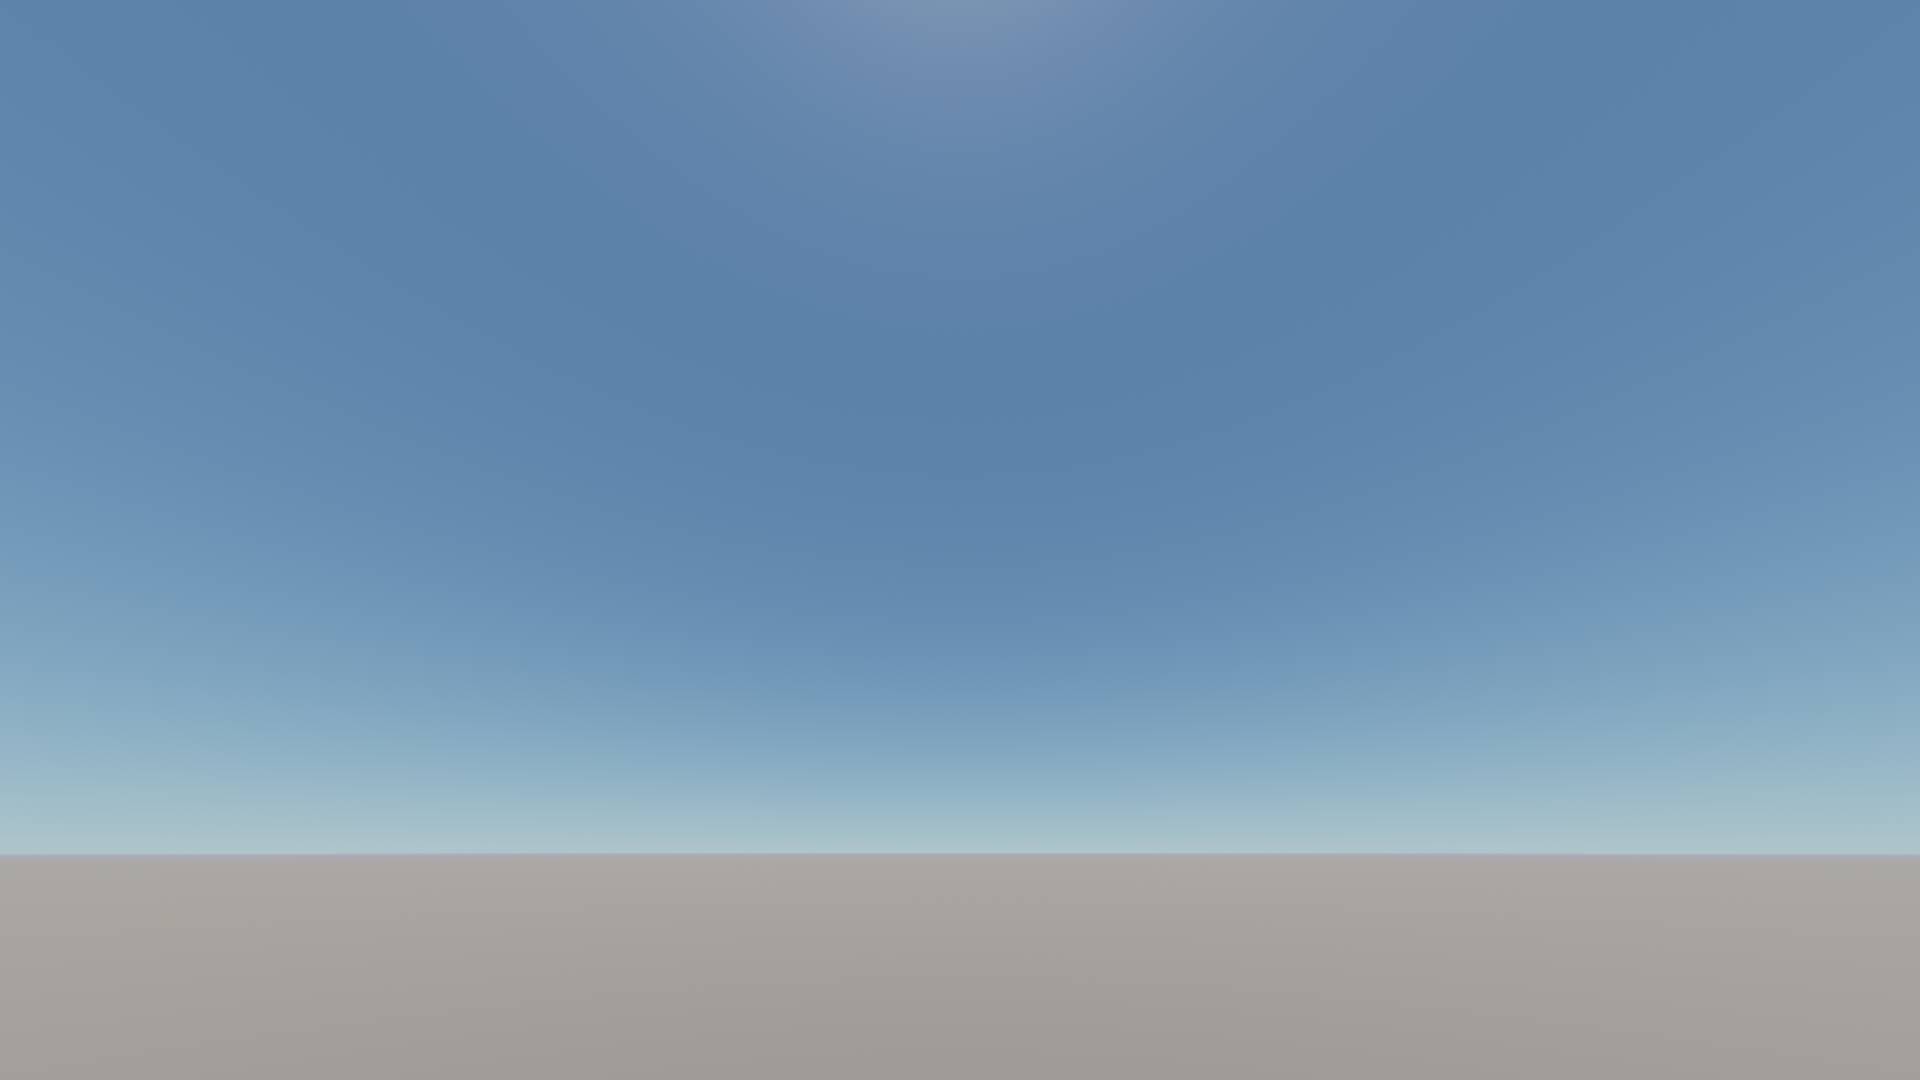
This should theoretically be an artifact of the numerical integration approach, and so the difference should disappear when increasing the number of integration steps. But it doesn’t, so I suspect there’s still something wrong somewhere. But it’ll do for now and hopefully forever.
Horizon bending
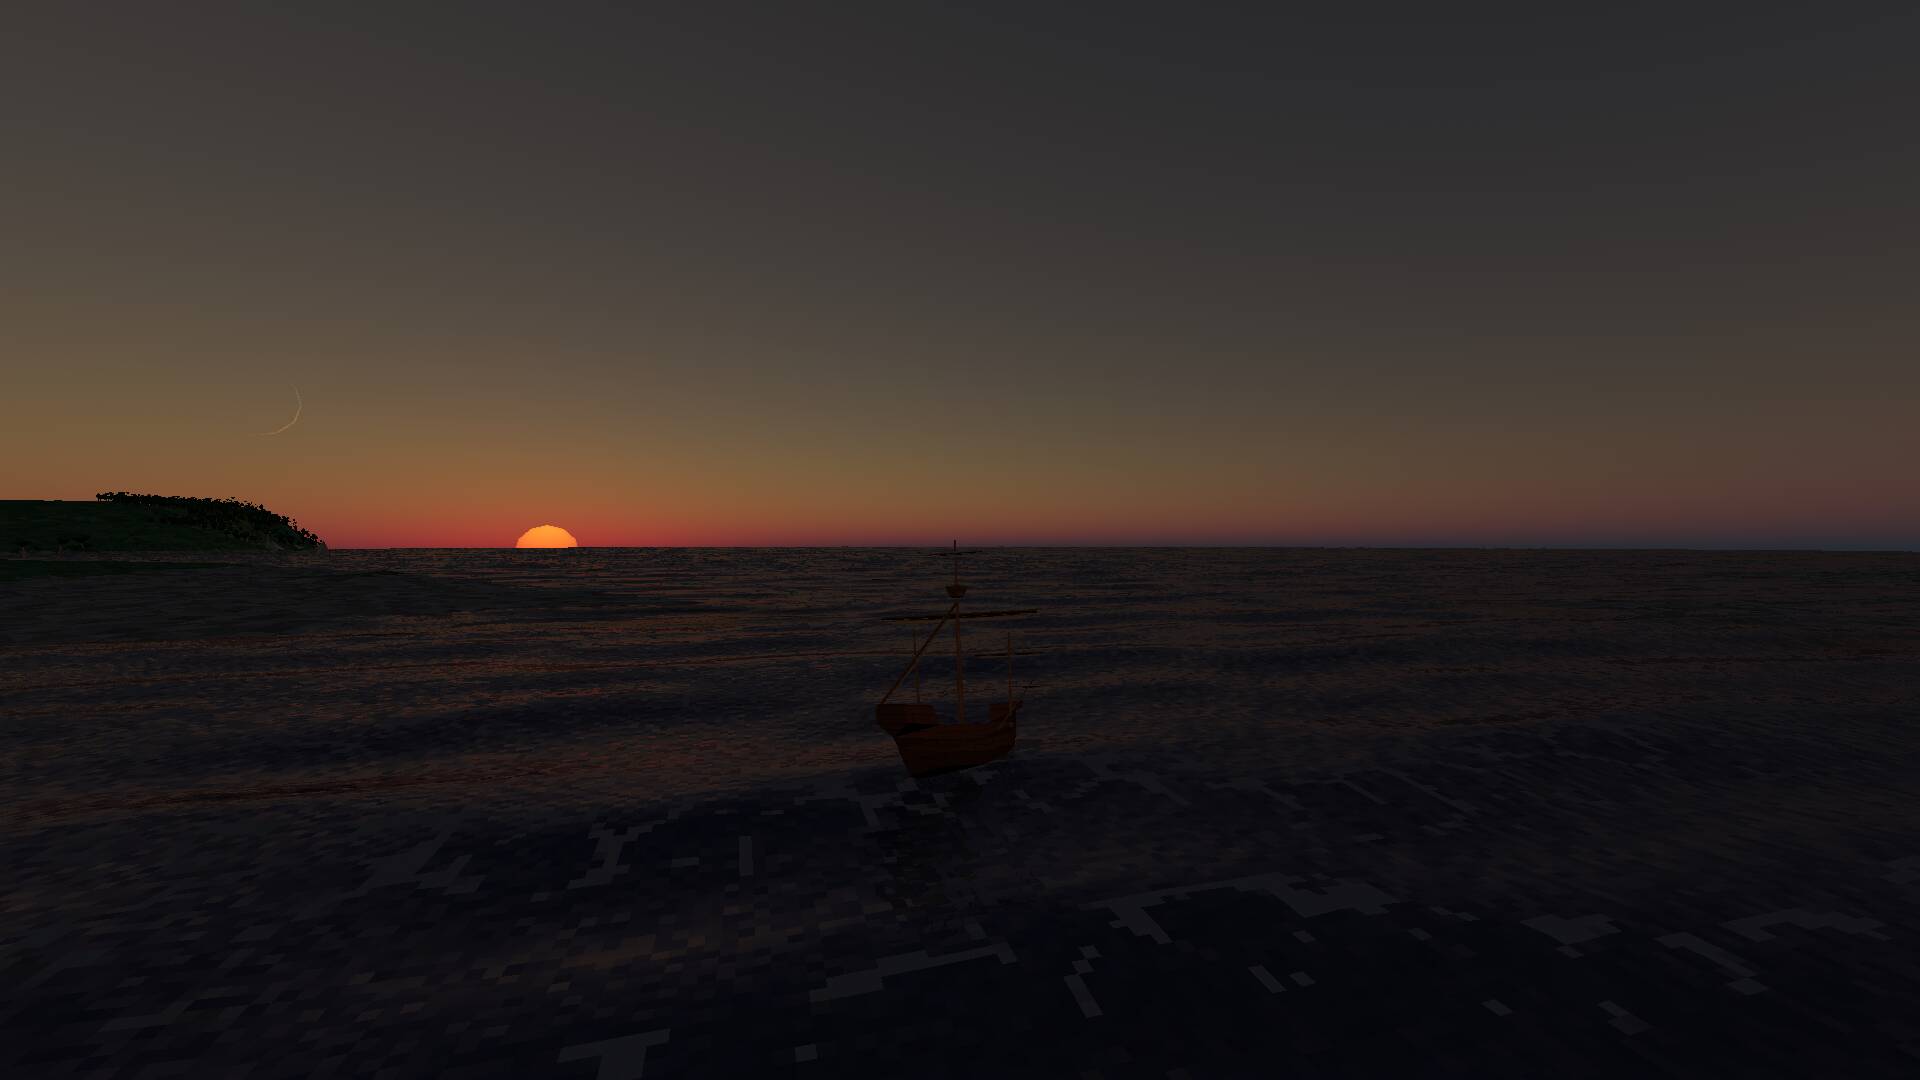
To render a realistic sky, I have to use parameters of the real Earth, like atmospheric density, height and planet size. However, the planet in my game is about 75× smaller than Earth, and so it’s curved more strongly. So when we use Earth parameters for the sky, the sky’s horizon ends up above the actual horizon. In between the two horizons, the sky shader pretends that the atmospheric density continues to increase exponentially towards the centre of the planet, which causes a dark band that’s especially noticeable during sunrise and sunset:
To make the two horizons meet, I applied a simple hack to the sky shader: add a small value to the y (vertical) component of the global view vector, then re-normalize it. The effect is to pull down the entire sky, most strongly around the horizon, causing the dark band to disappear behind the real horizon:
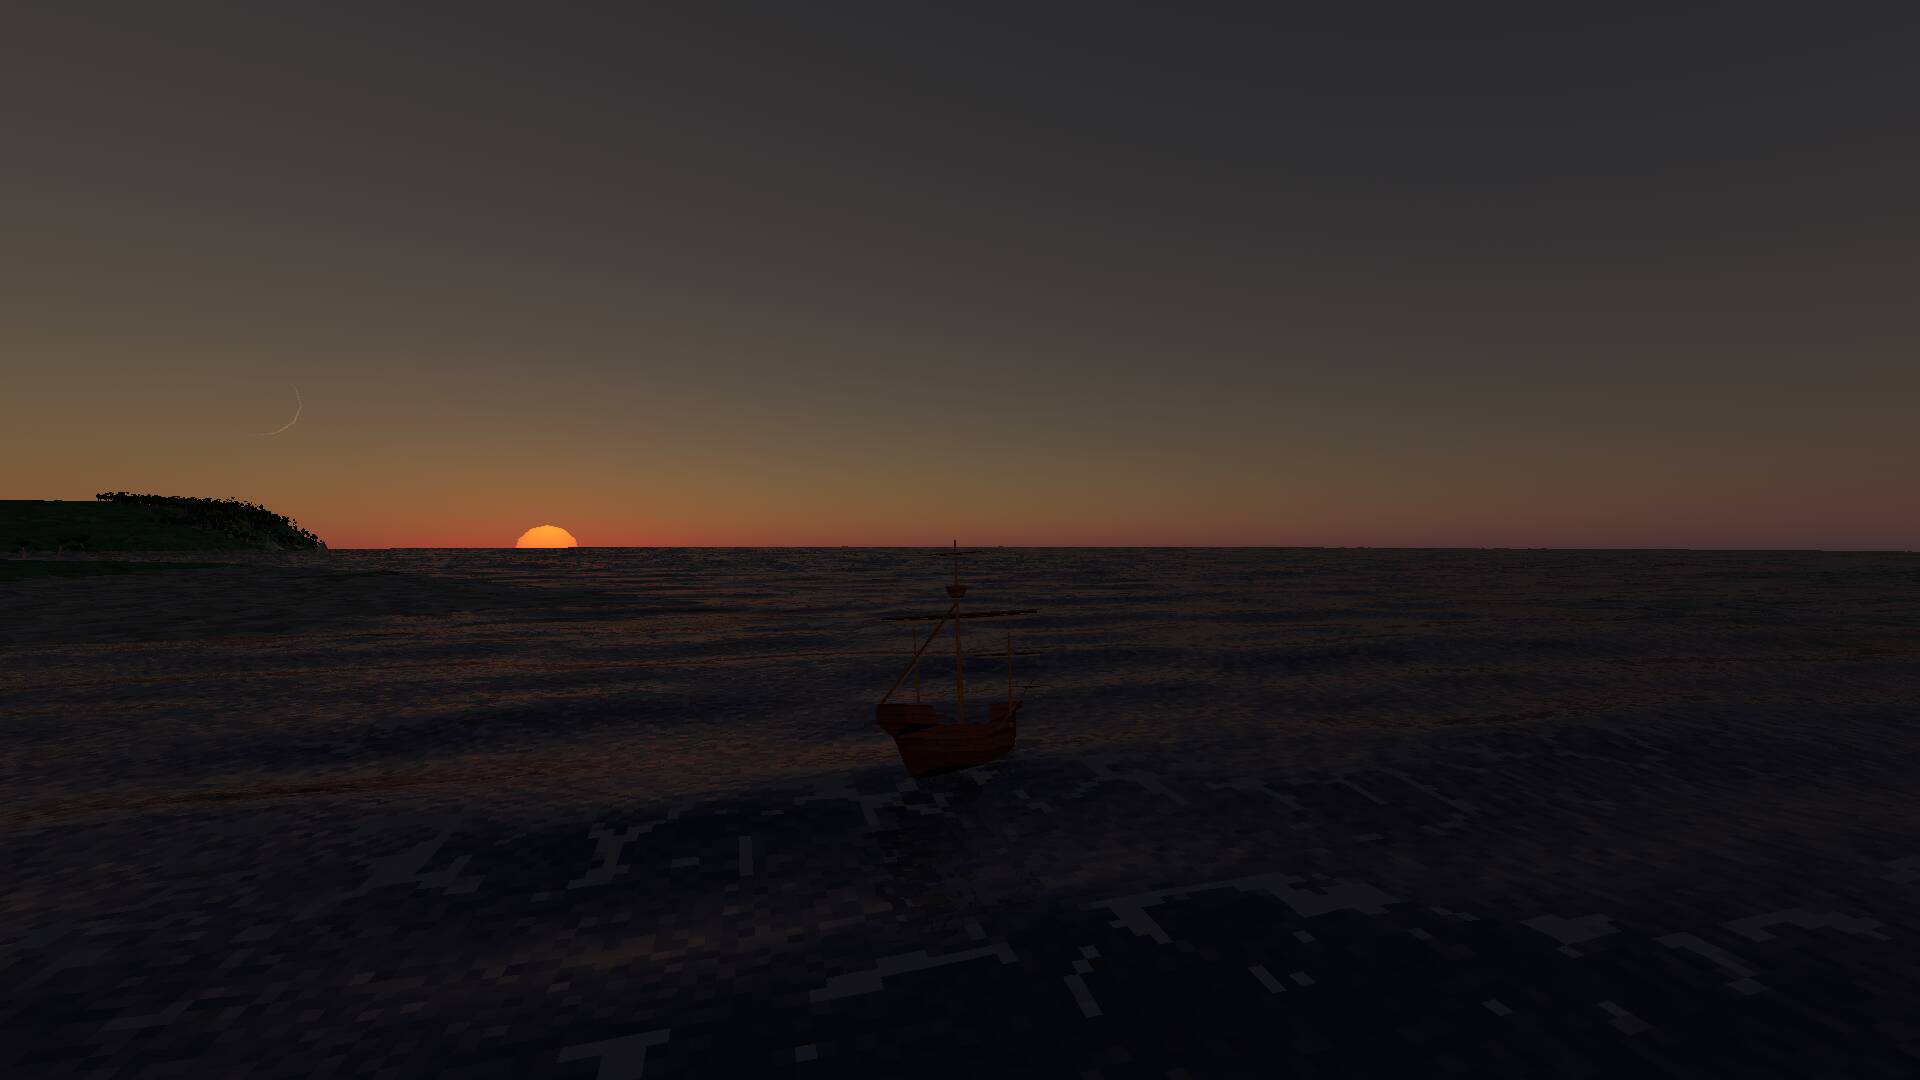
It’s a hack, but cheap and effective.
Tone mapping
Ah, the bane of every modern 3D game artist. Games are rendered in HDR (high dynamic range) nowadays, meaning their colour values can go brighter than the maximum of 1.0. If we display these on a typical monitor, the result has to be clamped, resulting in patches of oversaturated colours:
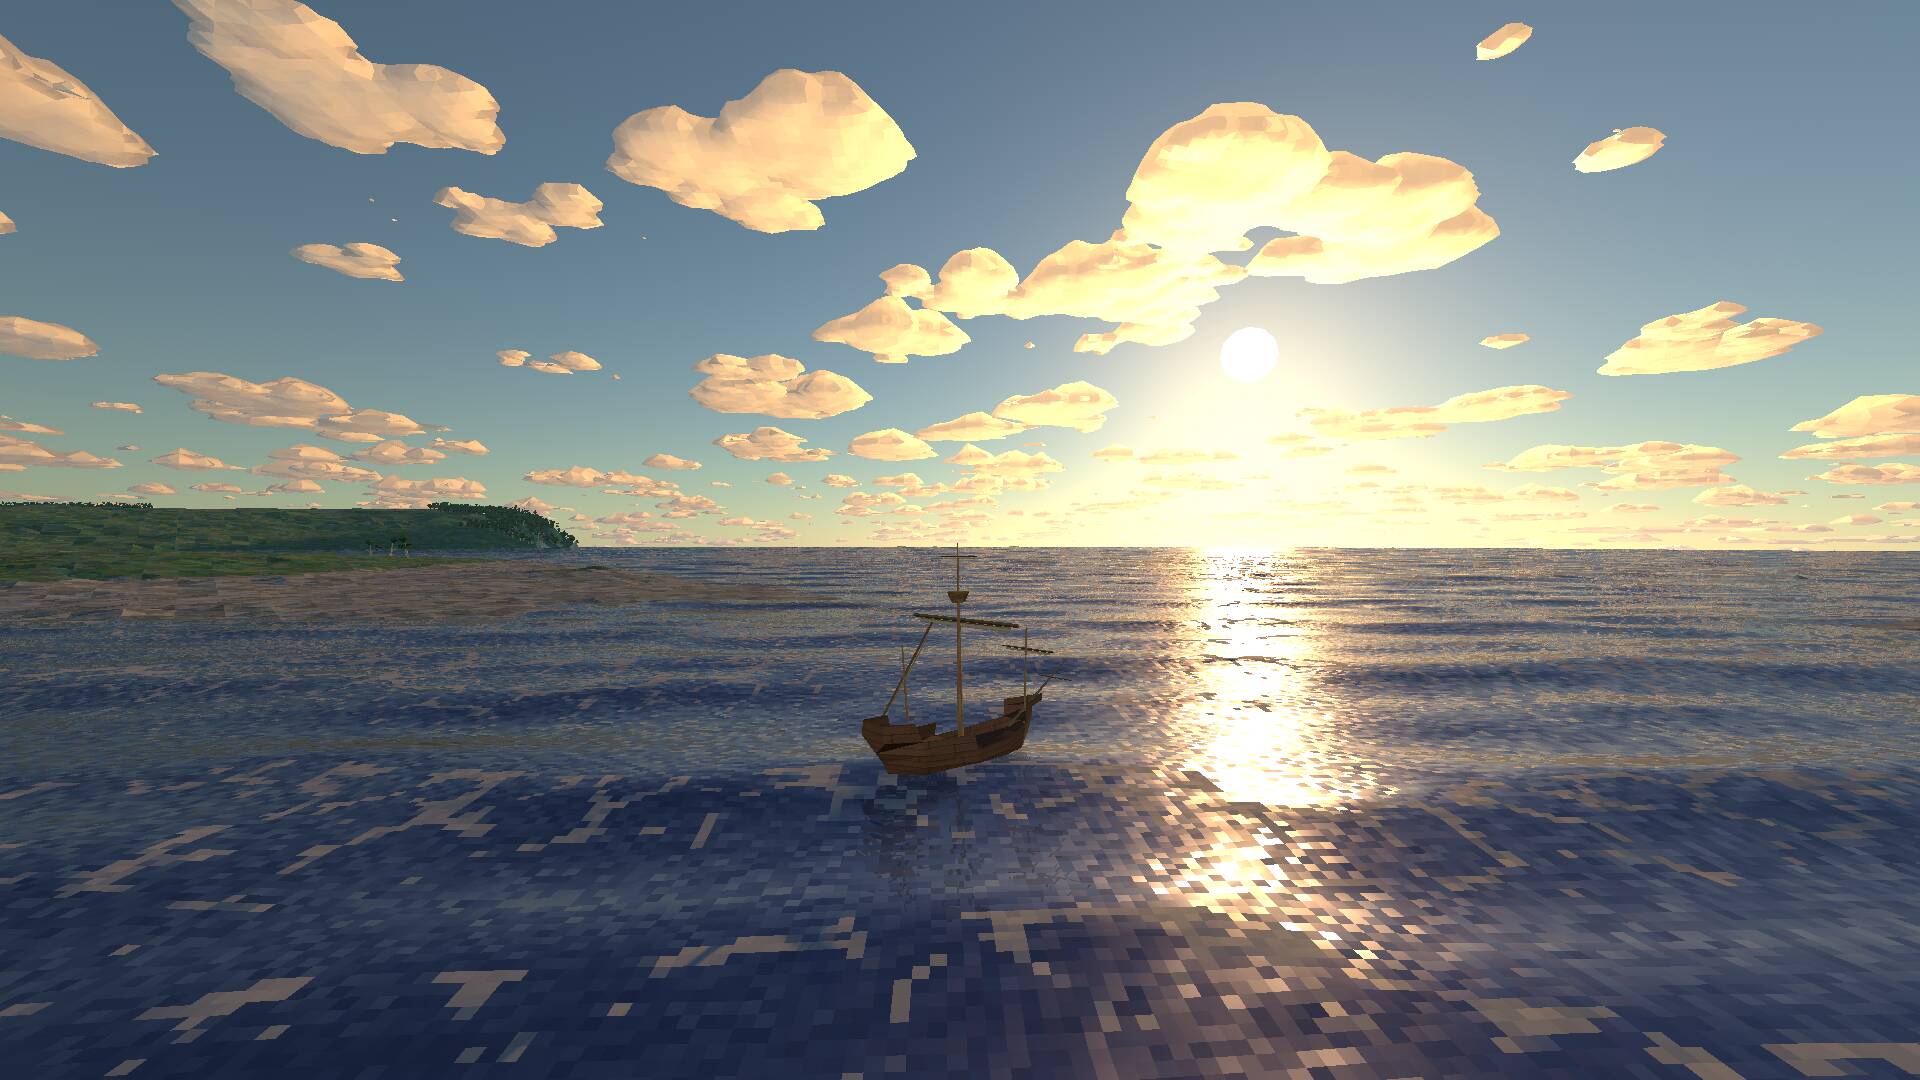
To fix this, some tone mapping formula is typically used to map the HDR values back into LDR space for display. Godot implements several tone mappers; I found Reinhard to be too dark, and ACES and AgX too desaturated. So in the end, I settled on Filmic tone mapper with a white point of 2.0:
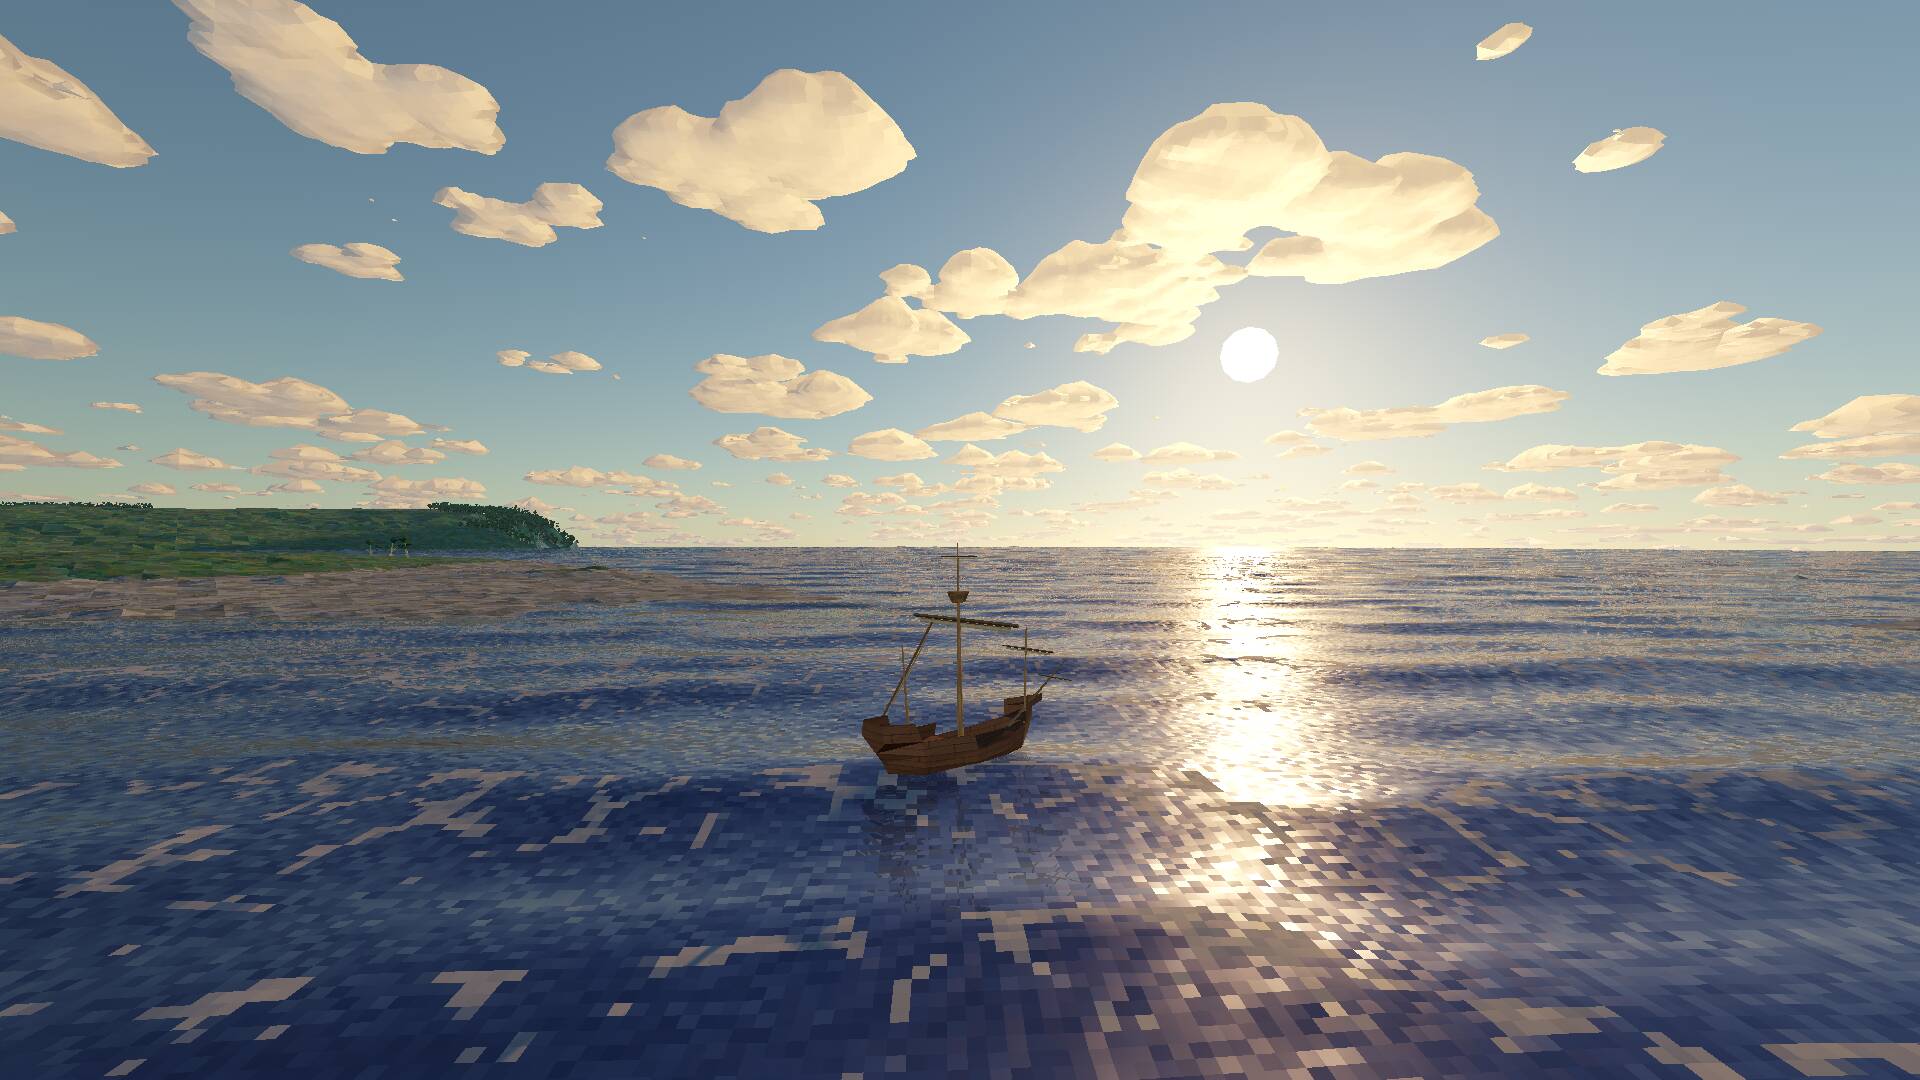
It gives especially the clouds a nice soft look, and makes them fade into the distance much better.
The choice of white point is still fairly subtle since Godot itself recommends at least 6.0 for “photorealistic rendering”, but that just makes everything look darker.
Tuning the tone mapping is a tricky endeavour, because changes to the tone mapper affect everything that came before. So in practice, this process was not as linear as I wrote it down here, and required some back-and-forth between adjusting the tone mapper and the scene lighting. For one, I literally reduced the brightness of the sky by a factor of 2, which gave much better contrast after tone mapping.
The orrery
If we want a proper day-night cycle, we need the sun to rise and set. And if we want our planet to feel Earth-like, the times of sunrise and sunset should depend on location and season. This dependence is due to the motion of the Earth around the sun and around its own axis. A similar thing happens with the motion of the moon through the sky, and the phases of the moon.
It seemed complicated to figure out all the math to do these calculations properly. So I took an easier route: I modelled the entire situation in the engine, making the planet and its moon spin around like in an orrery:
Then I let the engine figure out the inverse transformation to determine where things are in the sky, from the point of view of an observer somewhere on the planet’s surface. This worked well, and the rendered orrery turned out to be a useful debugging aid.
After all that, I think I owe you another sunrise video, don’t I? And let’s find a scenic in-game spot for it, too!